About MCaaS
Tunnel Jumphost Connectivity
Putty Method
Set up Putty to tunnel through your tenant Jumphost
-
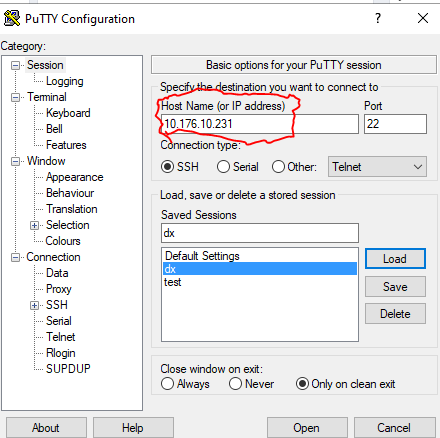
Put your current Jumphost IP in the Hostname section
-
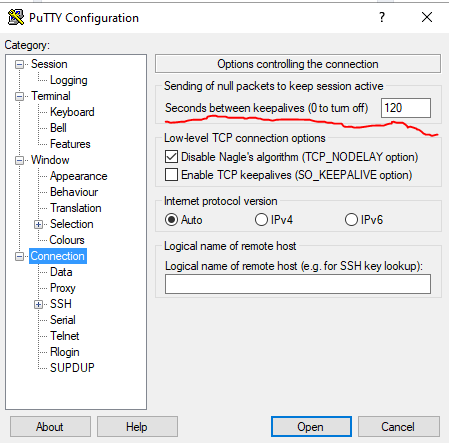
In the Connection section, put 120 as the keepalive time to ensure that you aren’t disconnected due to idle timeout
-
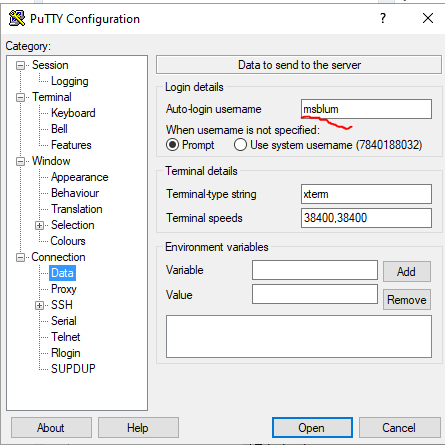
In Connection->Data, put your SNA under username so it is automatically used for the jumphost connection
-
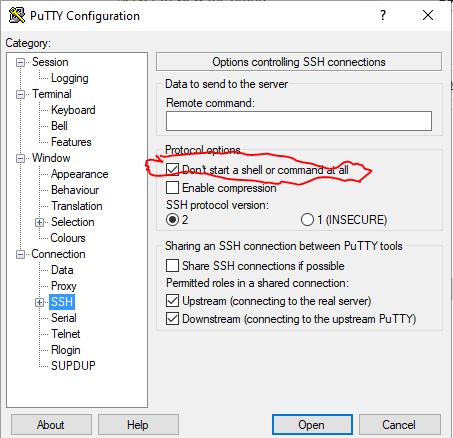
In Connection->SSH check the Don’t start a shell or command at all box
-
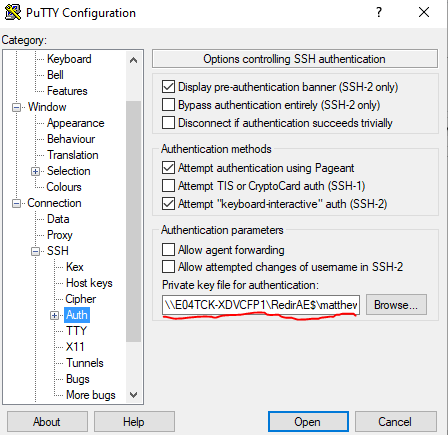
In Connection->SSH->Auth menu, link to your private key (in ppk format)
-
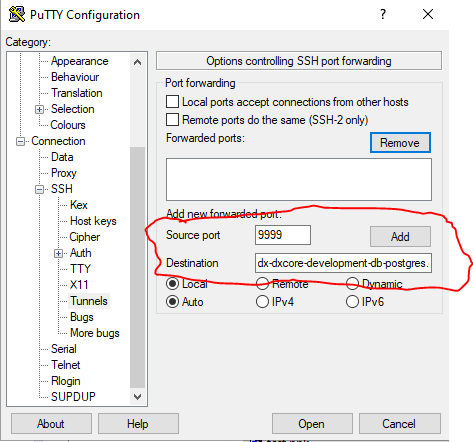
In Connection->SSH-Tunnels, you want to add a tunnel for each db you’d like to connect to. To add a db input the following:
a. Source Port: An arbitrary local port you want this database connection to map to. You’ll use this port later in the pgadmin configuration. It can be any open port but it’s probably a good idea to have this be the same across your org to avoid confusion. For this example I’ve chosen port 9999.
b. Destination: The endpoint of the database you’d like to connect to. This must be the full connection string of the database, including port. For example for a dev db you would put something like
<tenant>-<app>-<env>-db-postgres.cluster-ceadwaajeb7y.us-east-1.rds.amazonaws.com:5432c. Make sure the Local and Auto radio buttons are checked below
d. Click the Add button to add this mapping
e. Perform additional mappings for each db, taking note of which ports you’re connecting to each db to avoid confusion. The below screenshot shows one db configuration for the above dev db before hitting the add button.
-
Once you’ve added all the dbs you want to, save this Putty config for later use
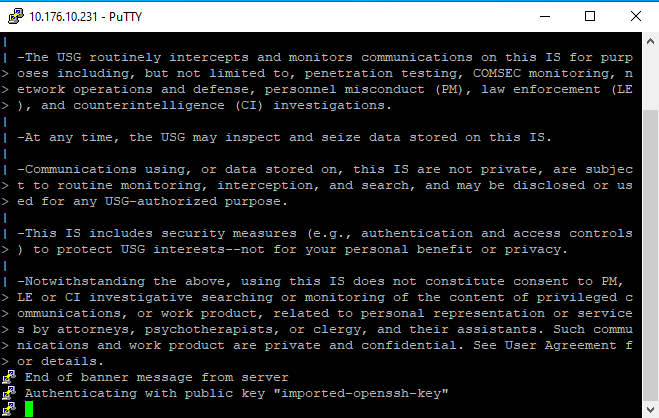
You’ll know if this Putty connection is successful if you open it and a window displays. It will not accept input at all but the window should stay open
Now you're ready to connect your db tools to the local tunnel you've created!
Connecting a DB tool to the Jumphost
Following is an example of how to connect one db tool (pgadmin). Other tools should use similar principles.
-
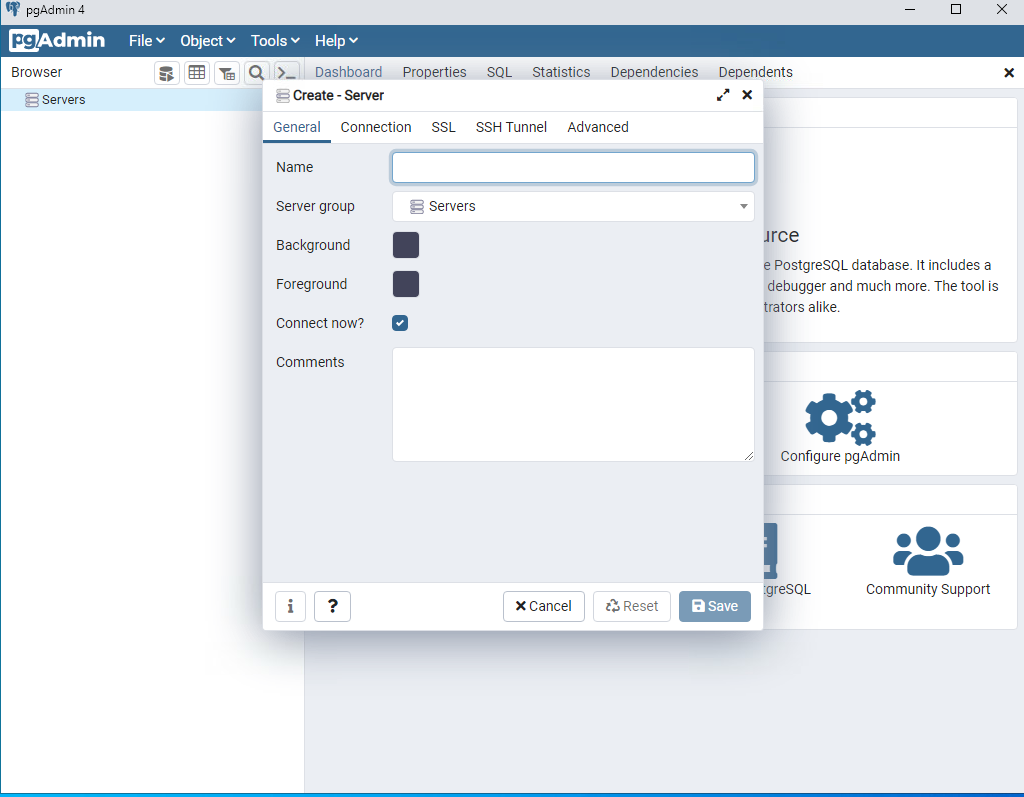
Now we need to configure pgadmin to use this tunnel. Right click Servers and choose Create -> Server
-
Use a descriptive name for the server, for example
<tenant>-pg-dev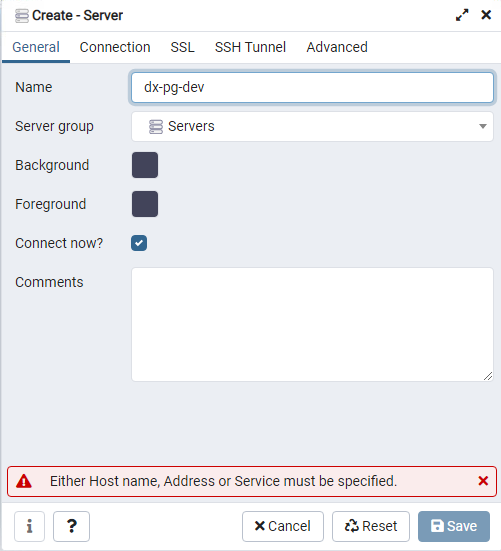
-
Move over to the connection tab
-
Use localhost as your host name/address. We’re able to do this because we used the jumphost to map the database connection to our local network.

-
For port, you want to use the port number you placed in Source host in the Putty config from earlier. For this example the port would be 9999.
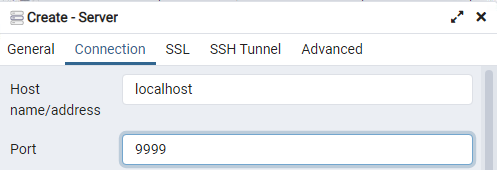
-
Finish the configuration by adding in the username and password from the tenant secrets sheet
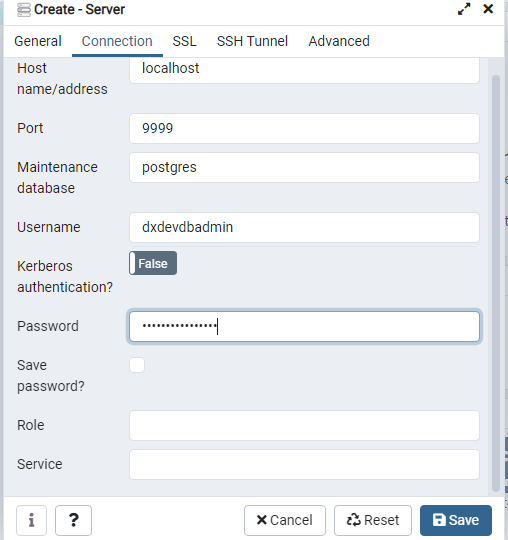
-
Save the config. The connection should be successful as long as the Putty connection window is still up
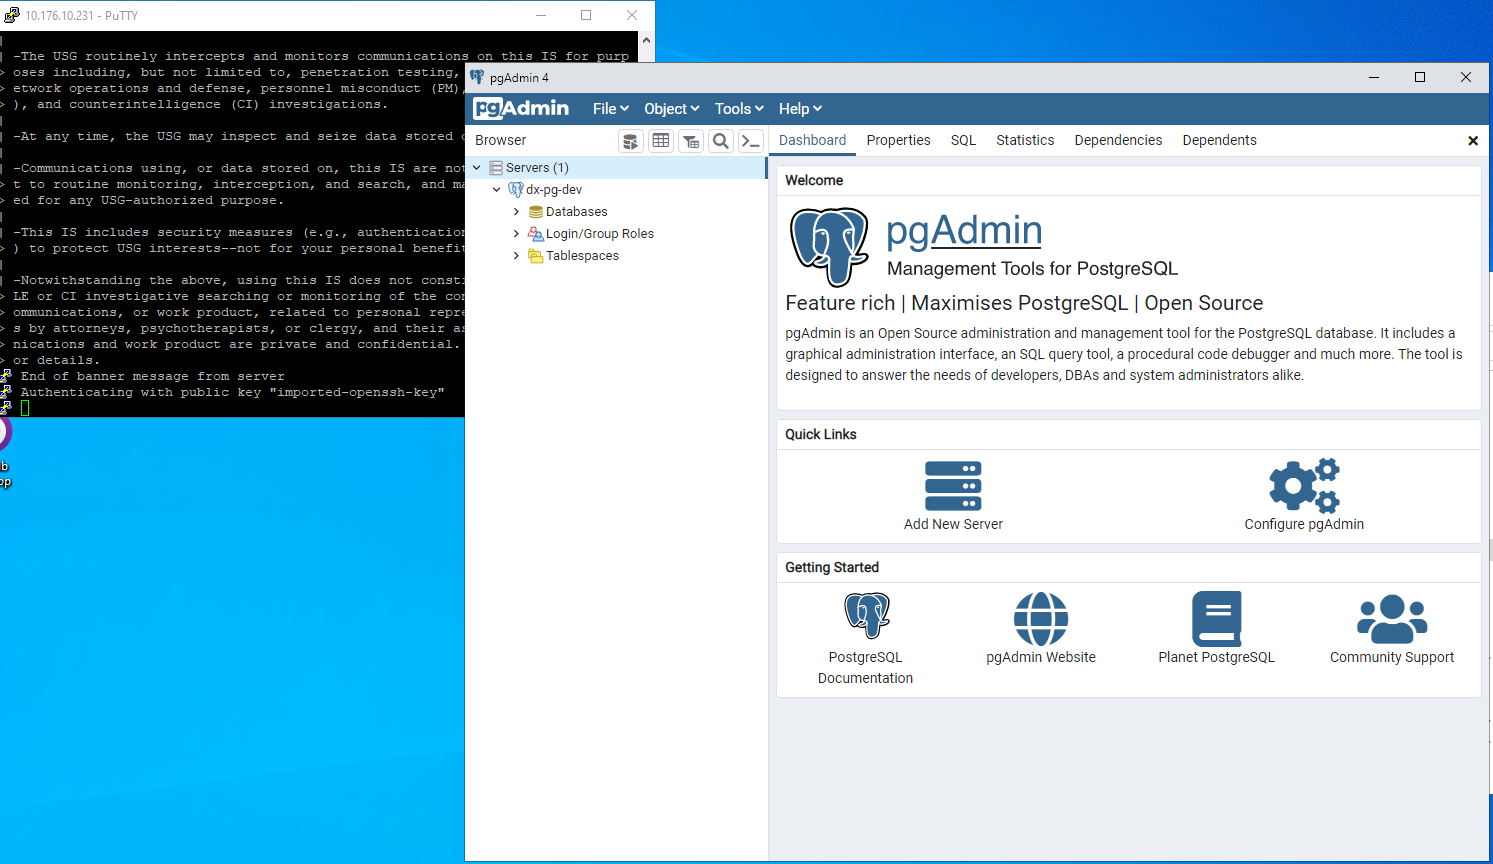
-
Continue to add dbs using the ports you configured in step 6e of the Putty config. Now you should be good to go!
- On this page:
